Saturday, December 22, 2012

Tis the Season to Be Jolly....

More Crafty Christmas-ness form me.  This time I wanted to show off my gift tags and wrapping.  When I was in high school and just after my first attempt at college I worked retail. And the thing I took away from working the holidays in a mall (other then feet that still hurt) is wanting to wrap a present so it looks like it's from a TV show or a store display.

This year I had a lot of help from my handy dandy Cricut.  I recently purchased the Creative Memories "Holiday Tags & More" cartridge and the digital 3D bows package for my Craft Room. (Some time I will have to talk about what a great tool Cricut's Craft Room really is.)  And I used these combined with some of this years beautiful holiday pattern paper to finish off my gift wrapping perfectly.

 First off the gift tags.  I picked 3 or 4 of my favorite tags off the "Holiday Tags" cart and set them up to cut out all the layers on different pattern papers I thought co-ordinated. I then glued them together in various combinations.  Since I did a snowflake theme this year I choose tags and paper that reflected that.  Here you can see them on my desk drying after I added some glitter glue in sparkling shades from Viva and Stickles.


For my wrapping paper I found this gorgeous hand printed on recycled cotton  paper at the Container Store. (OMG they always have the best papers!) It has these concentric circles with a glitter circle in the center. I also have some snowflake and Cjhristmas tree prints in golds and blues.I used the 3D bows in my craft room to make theses cute little bows from card stock and pattern paper. There are 4 basic bow shapes, the single bow, the double bow, a long loopy strip bow and the "rosette" type bow that looks sort of like the ones you would buy in a bag with a square of sticky stapled to the bottom. (You will need brads to assemble the last 2 types.) Each type then has some different styles of edges and layers, like scallops or lacy.  I used alot of the single bow with either a single scallop edge or straight.  I thought they looked clean and pretty. Like the cream and gold card stock one above.


Here you can see a few of my wrapped gifts all ready for giving. As you can see I tried all the different bow shapes out.  I try to mix up my wrapping a bit, with some ribbons and traditional bows as well as adding Cricut cut snowflakes.

 
Here is an example of a "rosette" type bow.  I thought they were really cute all tiny like this one on a jewelry box.  But make sure to get a brad with a long "stem" when you assemble it. (And isn't the candy cane pattern on it so sweet?)


I am all excited to start giving out my gifts now that they are wrapped and ready!
Hope your Christmas in Merry and Bright and that your New Year's is Rockin'!!!!!

Wednesday, December 19, 2012

Decking the halls

Continuing with my Crafty Christmas theme, I have been making some paper flowers and turning them into wreaths and bouquets for decorations and gifts.

I learned how to make the flowers at Perfect Day Scrapbooking's all day black Friday crop from a very nice lady.  This you tube video shows how to make a similar flower.  I used 4 inch squares of paper and instead of folding the two side triangles down with the "back pattern" showing, I just folded it the opposite way.  Also I used a low temp hot glue gun not the tombow multi glue.I also used from heavy to thin weights of paper, a medium weight seems to work best.
  

A bag of folded "petals" ready to be glued together

 
Some of the flowers in bouquets.  I used faux pearls and colored beads in the centers and glitter glue along the edges of the petals.  Ranger's stickles and Viva Decor glitter liner worked best.

 The wreath I made for our apartment. Snowflakes are my decorating theme this year.  The following are wreaths I made as gifts.  I was really happy with how they looked.


I will post later about how I am doing my gift wrapping and cards.  Hope your holidays are merry!

P.S. If you want written directions I have a pdf I can email, just drop me a note at laurel.and.maggie@gmail.com.

Sunday, December 9, 2012

The Holidays start with....a Wizard of Oz Mini Album


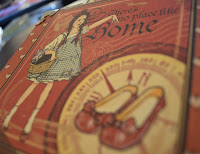
So I decided that this year is a crafting Christmas.  I have been busy making gifts and decorations.  For my step sister I picked up a Pinecone Press kit to make a mini ablum using the Graphic 45 "Magic of Oz" line.

First of all I love love love this paper.  I know my step sister will too, because she likes vintage and the Wizard of Oz.  I picked up a kit mainly to save time.  But also because I had bought several of the Pinecone Press album bases, like the interactive album in this kit, during Shop Hop and it was nice to learn how to put the pieces together.

I did not follow the instructions to the letter, the measurements left a bit more of the kraft colored chipboard showing than I like.  I think I will use the blank chipboard albums for more projects now that I have put one together.  I recommend the Pinecone kits, they use some pretty cool papers (lots of Graphic 45 yay! among others) and some unusual shapes and sizes for their custom album blanks. Visit their site here.


Monday, August 13, 2012

My First Shop Hop!

I just wrapped up doing the So Cal Shop Hop. And O M G that was so much fun!!  I didn't even know this even existed until I visited a local store and saw a sign advertising it.  I teamed up with Rosie and we went to all the stores.  They had fun photo ops and pins and make and takes. I spent far far too much, but I got a 20% discount at all the stores so whoo hoo! 

I bought or earned all the pins and both (2) make and takes from each store.  So I think I have a big chore in front of me to finish putting everything together.  I plan to make a custom album that will allow for the pin to be stored on the same page as the make and takes.  Any ideas?  I was thinking ribbon or a strip of card stock could be a base for the pins.

Some of the highlights for me were:
  • the make and take at Stamping Details in Poway, CA. They taught me a new technique using Versamark and perfect pearls and the butter flies were so pretty.
  • driving to Bakersfield, CA for the bonus stores.  I wrote and recorded my own "one hit wonder" on the way for the FB contest. lol
  • Finding some new store and meeting some new people.  Many stores like Stamping Details, Jolene's Paperie in Banning and Scrapbooking Made Simple in Santa Clarita stayed open really late to accommodate us. That was super nice.
  • Decorating my tote at my homestore, Perfect Day Scrapbooking in Huntington Beach, CA.  That was a fun night of getting to know people.  And I think my bag came out awesome.
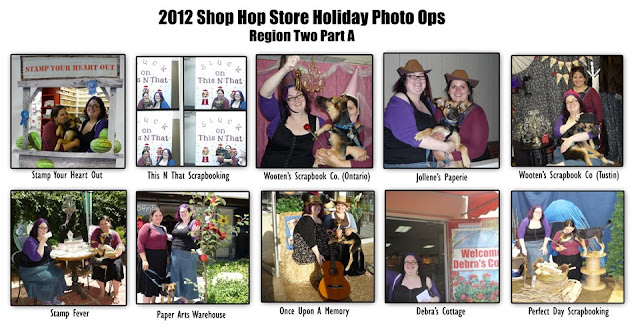
 Did I mention there was a Wacky Holiday theme? And a Facebook picture contest (I think I did all the photos.)?  Or that Rosie broght her puppy to all the stores? (She really did- and everyone was so nice about it.) I could go on and on, but a photo is worth a thosand words, right?  So below are some pictures from the Shop Hop.


Sunday, June 17, 2012

Happy Father's Day!!!! with a card

Today is Father's Day and I thought I would share the card I made my Dad.  As I have said in previous posts, I find making a masculine card a bit harder that one for a girl.  But I do like how this card came out.  I used my Cricut and my new favorite paper stack, K & Co.'s Designer paper.

I started with the Star Card from the Wild Card Cricut Cartridge. I used a rectangle from Craft Room Basics to weld another panel at the bottom of the card that would flip down when the star was opened. I think if you look at the pictures you will see what I mean.  I used the purple polka dot paper for the card base and added the star outline in a teal blue plain card stock.  I then added the "Dear Old Dad" sentiment from the holiday Craft Room digital cartridge Father's Day-Dear Old Dad. I only used the text portion and not the shadow or stars.  I cut it out in a line green and a pattern paper and layered just the "old" portion over the green in the pattern. (I will look up the name of the paper and list at bottom.) I then used my liquid pearls in a teal color to outline the star on top of the border and my Martha Stewart glitter pen in green to highlight the text.


On the panel behind the star I added a background from the Paper Lace cartridge on the lace1 button of "Flower 2"; I re-sized it a little to make sure it fit on the added panel.  I then traced over the swirly bits with a glitter liner in iridescent. (I used the striped white and grey Designer paper for the lace.) On the back of the star I added a couple of different sizes of stars in the green and teal card stock . I used the star from the cards border and deleted one of the cuts in the hide contour feature. I decorated the teal star with an outline of holographic glitter liner and the green one with sunny yellow perfect pearls.


On the inside of the card I added the Happy Father's Day text from the digital Craft Room download " Father;s Day-Dear Old Dad."  This time I did add the shadow and the diamond/star layers. I used the same teal/bright green color combination.  I put a heavy layer of the iridescent glitter on the diamond shapes to really make them sparkle.  I also cut out 2 slightly larger sets of the diamonds and added them in the corners.I put in one more of the stars- a border stlye one to the fold in the card. And I also added a shadow panel of the lace I used on middle of card to the inside of the added panel to have somewhere to write a note to my dad.I decorated this with the teal Liquid Pearls.


Ok so by now you have probably noticed the weird spay marks in the corners.  I kinda screwed up when i was finishing up the card. I had gone out shopping and found a color of Tattered Angel's Glimmer Mist in a limited edition Halloween color I had been dying to try. Its called Afraid of the Dark and its like a purpley color with green glitter. And I thought it would match the card well but I was too excited and didn't test it so i sprayed too much and it came out clumpy looking and warped the paper. If I had taken my time and done it right it would have looked really cool, but I didn't and I am unhappy with how it came out. Oh well, the card as a whole looks cute and I was happy with it. 

So there it is my Dad's card.. I sent him a book and some sugar free chocolate too.  What did you do for Father's Day? Did you make a card or gift, I would love to see your projects too.

XXOO
L

Product List:
  • Cricut Cartridges: Craft Room Basics, Craft Room Father's Day-Dear Old Dad, Wild Card and Paper lace
  • Paper: K and Company-Primary Designer Paper, sei-Field Notes and Mike's card stock
  • Paints/Inks: Ranger Liquid Pearls-Peacock, Tattered Angels Glimmer Mist-Afraid of the Dark, Viva Glitter Liner-Iridescent and Viva Pearl Pen - Sunny Yellow

Saturday, June 16, 2012

Reason I have been so behind in posting....

I finally graduated!!! Yay!  I now have a Bachelor of Science in Game Art and Design from the Art Institute of Orange County, CA. Or I will have one once it comes in the mail. LOL.  Of course i couldn't graduate without doing something crafty.  At the portfolio show I used my Cricut to make signage and little boxes that looked like game controllers filled with candy.  (Many thanks to my wonderful bf for assembling boxes while I panicked.)


Product List:
  • Cricut cartridges: Wrap it up and Opposites Attract
  • Paper: Mike's cardstock and K & Co. Designer Paper

Another card!

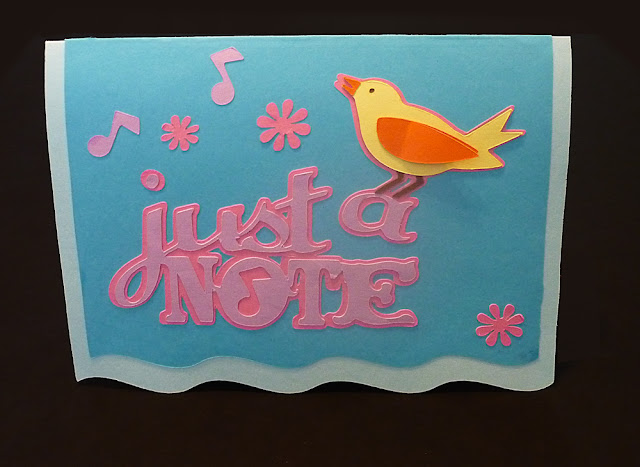
This is a card I made for Will to send to his Nana.  I wanted to do some thing cute and bright and fun, but sorta simple.   I decided to use plain card stock in yellows, pinks and oranges with a light blue background.  For the design I turned to my handy and helpful Cricut machine.  The main cartridge I used was the Everyday Pop Up Cards.  On the front I used the "Just a Note" Bird card.  I layered 2 sizes of the card to give it some interest and depth.  I also added a second wing directly on top of the first and only glued it at the base so it had some three dimensionality. I also added the three flowers from the Teapot card and used the notes that cut out of the "O" in note to further decorate the front.


On the inside I did the popup from the Flowerbox card.  I find some of the popups hard to understand because ther e is not much instruction with the cartridge, so I followed the way it was done on Crafting with Katie's site.I made the flower box in colors in its flat form and attached it to the pop out instead of trying to stick the individual flowers in the slots. That was so much help. Thanks Katie!!  Above the flower box i added clouds and a smiling sun from the Create a Critter cartridge. (Will suggested the sun) and added a small bird from the Picturesque cartridge (Robin).  The clouds are the only place I used a pattern paper- they are in the striped white and grey from the K and Company (Primary) Designer's Paper. (I should have gotten 2 of theses, I love the subtle monochrome patterns. So useful on cricut designs.)


I think the card came out adorable and happy.  what do you think?  Have any of you tried the pop up cards on the Cricut?  I would love to see how some of the other cards work and look.  Thanks for reading! XXOO

Product List:
  • Cricut cartridges: Everyday Pop Up Cards, Create a Critter and Picturesque
  • Paper: Michael's cardstock and K & Co. Designer Paper

Wednesday, May 9, 2012

Better late than never, Rita's birthday card.

So I once again was late on sending out some one's birthday gifts and card.  I am so bad at that now that I live on the other side of the country! And it costs do darned much to over night stuff to Maryland. Grrr.

Anyway.  I made a cool card for my Step mom withe the cricut that I hope she will like.  I used the Art Nouveau cartridge, which she has liked in the past.


The card shape its self is made from a shadow shape on Art Nouveau as are the overlay and the dragon fly.  The "R" is from the Sophisticated font overlay. I used plain card stock in purples, teals, yellows and browns. I used brown and copper colored chalk/ink on the edges and in the negative space to make it look a wee bit distressed and vintage-y.  I probably used a combination of Tim Holtz distress inks and stains.  I applied Tim Holtz Clear Rock Candy Crackle to the wings of the dragon fly which gave it a cool stained glass look. And to bling it out a bit I added rhinestones to the "tail" and nect to the "R."  And to finish it up I added Viva Decor pearl pen dots on the tail and around the border of the card.


On the inside I used the Art Nouveau cartridge to add some pansy flowers which put a nice glitter shine on with Viva Decor Holographic colored glitter liner. I added "happy" in the upright font on the Opposites Attract cartridge and "birthday" in Plantin SchoolBook. (I added a line below it to make it easier to place the wording.)  I cut the word belated out of the background, so it shows up in "negative space."  I honestly cannot remeber what pattern paper I used. (Rita's birthday was back in late March.)  I know the grid one was out of DCWV pad I got at JoAnne's, the blue glitter was probably from Micheal's and the dot paper was out of a Mind's Eye 6x6 maybe.  I am really sorry.  If you really want to know the paper I can try and research it better just email me at laurel.and.maggie@gmail.com)

Rita did like her card and gift, so I did get a pass on missing the actual dat. Phew.

Product List:
  • Cricut Cartridges: Art Nouveau, Sophisticated, Plantin SchoolBook and Opposites Attract
  • Paper: Plain cardstock in teal, yellow, lilac, light freean and dark green.  Unknown DCWV pattern paper.
  • Paints/Inks: Viva Decor Pearl Pen in copper, Viva Decor Glitter Liner in holographic, Tim Holtz Crackle Paint in clear rock candy and TH distress inks and stains.


Monday, February 20, 2012

Two More Cards

I thought I would share two other cards I have made this February.

First is a Valentine's Days card I made for my Dad and Stepmom. They have a really beautiful koi pond so when I saw the koi fish on the Cricut Art Nouveau cartridge I thought it would be perfect.  I made two kissing koi on the cover.  I think it came out pretty cute and I like how the patterned paper made the fish look. I used the Cricut Craft Room to weld the shadow layer and lay out the card. (Full product list at end)

The card base id from 3 Birds Life's a Party cartridge and the fish and background shape are from Art Nouveau. I added some ruffled hart shapes from Victorian Romance.  I used different patterned papers and made the fish colors reverse to compliment each other.  I added some glitter on the fins to give it that shiny wet look. I also added some liquid pearls and iridescent glitter to the hearts.
I repeated the background shape from Art Nouveau inside and added hearts from Plantian Schoolbook.  I hand wrote my message and added a couple more glitter hearts.  I put liquid pearls in bisque around as a border.

The second card is a birthday card for my Dad.  I always find it hard to design a card for a guy.  So much of the art and decorations I find lean toward the girly or are a steam punk theme (which doesnt suit my dad.)  So I searched through all the Cricut options I have and decided I really liked the idea of the argyle pattern on the Wild Card cartridge.  I decided to add an owl from Create a Critter on top of the pattern. I thought it was cute and worked for a dad card.

The background is cut on the Cricut from the Wild Card cartridge.  It is two layers with diamonds cut out over the base card, but creates a cool effect. I used some pattern papers for the owl to make it a bit quirky and less plain. "DAD" is in a font off Opposites Attract. For some reason the Cricut wouldn't cut through the hole in the "A" properly (the glitter paper from Michael's was super thick) so I put a heart "scrap" on top of it.  I didn't really add much extra decorations, just black marker on some of the edges.
I used the diamonds that were cut out of the argyle pattern on front to make a pattern inside.  I added liquid pearls in bronze where the diamonds met and on the top/bottom tips. The happy birthday is from the Life's a Party Cartridge.

So I am pretty happy with the cards.  They aren't overly bling-y, but I think they look nice and my Dad and Stepmom will enjoy them. I hope you do too.

Products:
Koi Valentine:
  • Cricut Cartridges: Art Nouveau, Life's a Party, Plantain Schoolbook and Opposites Attract.
  • Paper: Michael's Cardstock, Teresa Collins-Fabrications,DCWV-Tradewinds, Recollections-Animal Kingdom
  • Paint/Inks: Liquid Pearl-Bisque, Studio Glitter (from the dollar bin at Mike's)
Birthday Card:
  • Cricut Cartridges: 3 Birds, Life's a Party, Create a Critter
  • Paper Mike's Cardstock, Kaiser Craft-Chanteuse, DCWV-Tradewinds, Recollections-Animal Kingdom, Glitter Cardstock from Mike's and the star paper is from Joanne's I don't know the brand.
  • Paint/Inks: Liquid Pearla- Bisque & Bronze.

Thursday, February 16, 2012

The card that started it all

So I figured I would start by talking about the project that inspired this blog.  I have a friend I had been making some simple Cricut cards for. First was stuff directly off the cartridges. Next I started using the Cricut Craftroom and welding. And during this time I started looking at some fantastic steam punk projects. (Particularly Carrie's designs mini album and Xannero1's custom mini) So I was inspired and decided to make a stream punk valentine's day card for my friend.  I showed it to my wonderful friend Rosie, who scraps with me, and she said I should take photos and blog it.  I kind of blew the idea off and just mailed it.  But then after I sent it I changed my mind.  My friend kindly took some photos of it for me. So here they are. (Full list of products used at end)
On the front I used the balloon from Cricut's Victorian Romance and behind it is an acetate heart from Teresa Collin's Timeless collection that was fussy cut and painted on both sides with Tim Holtz's crackle paint in rock candy.  I thought the see through aspect looked pretty cool.
On the front I used Tim Holtz paper from the Kraft Resist 12x12 pad.  I added one of his keyholes and some of his gears.  I also used brads with screw tops by Recollections and gears cut from the Cricut on both paper and shrinky dinks. The W charm is also by T.H. and the turtle was from the jewelry section of Michaell's. And I used Ranger's Liquid Pearl in Bisque on the joints of the balloon framework. The frame work is also popped up slightly with foam tape.
For the first pages I used a time/clock theme. I fussy cut some clocks and again used paper and shrinky dinks from Cricut. The paper on the right is from Graphic 45's Proper Gentleman collection and is one of my faves. The clock in the center was fussy cut from Creative Imaginations Rock Star paper. And I used a few more of the Timeless clock faces.
The center pages I themed around keys and locks.  The background paper is another beautiful Graphic 45 paper from the Le Romantique collection.  I cut some keys from the Cricut, Sophisticated and Victorian Romance cartridges. The gold key and butterfly is fussy cut from the Tradewinds pad by DCWV. The top has a border created from gears off the Indie Art cartridge I welded together in Craftroom with more of the screw-brads. I used another keyhole by T.H.  The gear paper on the heart is from the Tattered Times pad by DCWV.  On all the pages I hand wrote quotes pertaining to friendship on distressed paper.
On the last of the inside pages I used a small greenish brown checked paper by Kaiser Craft. and Cricut cut some more gears. Rosie helped me distress a lot of them and I think the big gear in silver she did is really awesome.  I used it to make a tag pocket.  The big fussy cut gear on the left is also from Tattered Times as is the background of gears.
This shows the last page with the tag pulled out. I stuck a short note and gift inside the envelope tag which was made with paper from the T.H. Kraft Resist pad and the top of the Creative Imaginations Rock Star paper I fussy cut the watch on the first inside page. The ticket I wrote "pull" on is also from Tattered Times.  I bound the card with necklace twine and tied gears from T.H. and the jewelry section of Mike's to it to create the tassel.


And finally the back of the card.  It has a clock and gears fussy cut from Tattered Times with a top hat from G45's Romantique collection.  I also added a T.H. gear to the hat.

 So that is the card that inspired my scrapbooking/craft blog. I really had fun making it and think the result came out pretty nice. Please let me know if you have any questions about what I did or whee I bought any items.

Product List:
  •  Cricut Cartridges: Victorian Romance, Indie Art, Rock Princes, Paisley, Wrap it Up, Wild Cards and Craftroom Basics
  • Paper: Graphic 45-Proper Gentleman, G45-Le Romantique, Teressa Collins-Timeless, DCWV-Tradewinds, DCWV-Tattered Times, Tim Holtz-Kraft Resist, My Mind's Eye-Everyday Fun, Kaiser Craft-Chanteuse and Creative Imaginations/Marah Johnson-Rock Star Ready 2 Rock.(All 12x12)
  • Accessories: Tim Holtz- Gears, Keyholes & Alphabet Tokens, Shrinky Dinks, Reflections-Screw Brads, and some pieces from the jewelry section of Michael's
  • Inks/Paints: Tattered Angels Glimmer Mist-Cinder, TA Glimmer Glaze-Cowboy, T.H. Distress Inks-Walnut Stain, Black Soot & Fired Brick, T.H.-Crackle Paint in Rock Candy, Ranger Perfect Pearl Mists-Heirloom Gold & Perfect Pearl and Ranger Liquid Pearls in Bisque.