Thursday, March 21, 2013

Graphic 45 Design Team 2013 Audition

As I finish up my Graphic 45 Design Team application, I am filled with pride, happiness,  some anxiety and lots of gratitude.  I am happy and proud that I not only finished six brand new projects for this application, but that two of them were entirely new areas of crafting to me. I am also a little nervous because this is my first design team call.  But most of all I am grateful. Grateful for the opportunity to apply for the G45 design team. And grateful to all my friends and family who have supported me as I created these projects.

So without further ado, here are my G45 Design Team projects.
Thank you again,
Laurel


1. A Ladies' Diary - Birthday Card
I made this card for my Stepmom's birthday.  I was inspired by some vintage lace I had purchased and the beautiful subdued hues of A Ladies' Diary. The card has multiple folder style panels, a cut out window, removable tags, detailed fussy cutting and a mini envelope.  I think it has a vintage elegance my Stepmom will love. For a more detailed description of how the card was made see the full length post.


2. Curtain Call - Interactive Mini Album & Matching Altered Box
This Graphic 45 Curtain Call album with matching box is my tribute to my Dad.   The sepia toned images of films , cowboys and music match up with his personality perfectly.  I loved adding multiple flaps, pockets and tags to the album, so there is a hidden secret on every page. Even though I made it the album the interactive features make it seem different every time I paged through it. Finding the perfect sized cigar box to make a matching case was a great opportunity to make my first altered box. And it turns a mini album into a coffee table dispay piece my Dad can share with all his friends. To see the full album and how it was constructed please read the full length post.


3. Bird Song - Altered Cigar Box
Bird song is one of my personal favorite papers. I used it to make a his and hers jewelry box that sits on my bed side table. At first it was hard to decide what embellishments and decorations to use with the paper, but it became easier when I added the vintage chopsticks and metal flowers.  I also used decoupage medium on the entire box, which taught me a lot about what not to do (glue the entire page to the box- not the edges) and to be patient (the bubbles and waves to disappear as it dries.)  I am really proud of how this altered box turned out and that I learned some new techniques for the future. To read more about these techniques and see additional photos, see my full length blog post.


4. Two Carta Bella Mini Albums - Well Traveled & Traditions Papers
These two mini albums became a challenge I gave myself.  Build two similar albums, but on one use the Cricut or any machines I wanted and on the other use only hand tools like a scoreboard.  I found it was fun to try and figure out how to achieve some of the same kinds of effects manually. Maybe I couldn't quite get the complex shapes of the Cricut, but I could still layer the pattern paper and add hidden nooks.  I think both albums are really cute and fun. For more information on the differences and similarities of these albums check out the full length post.


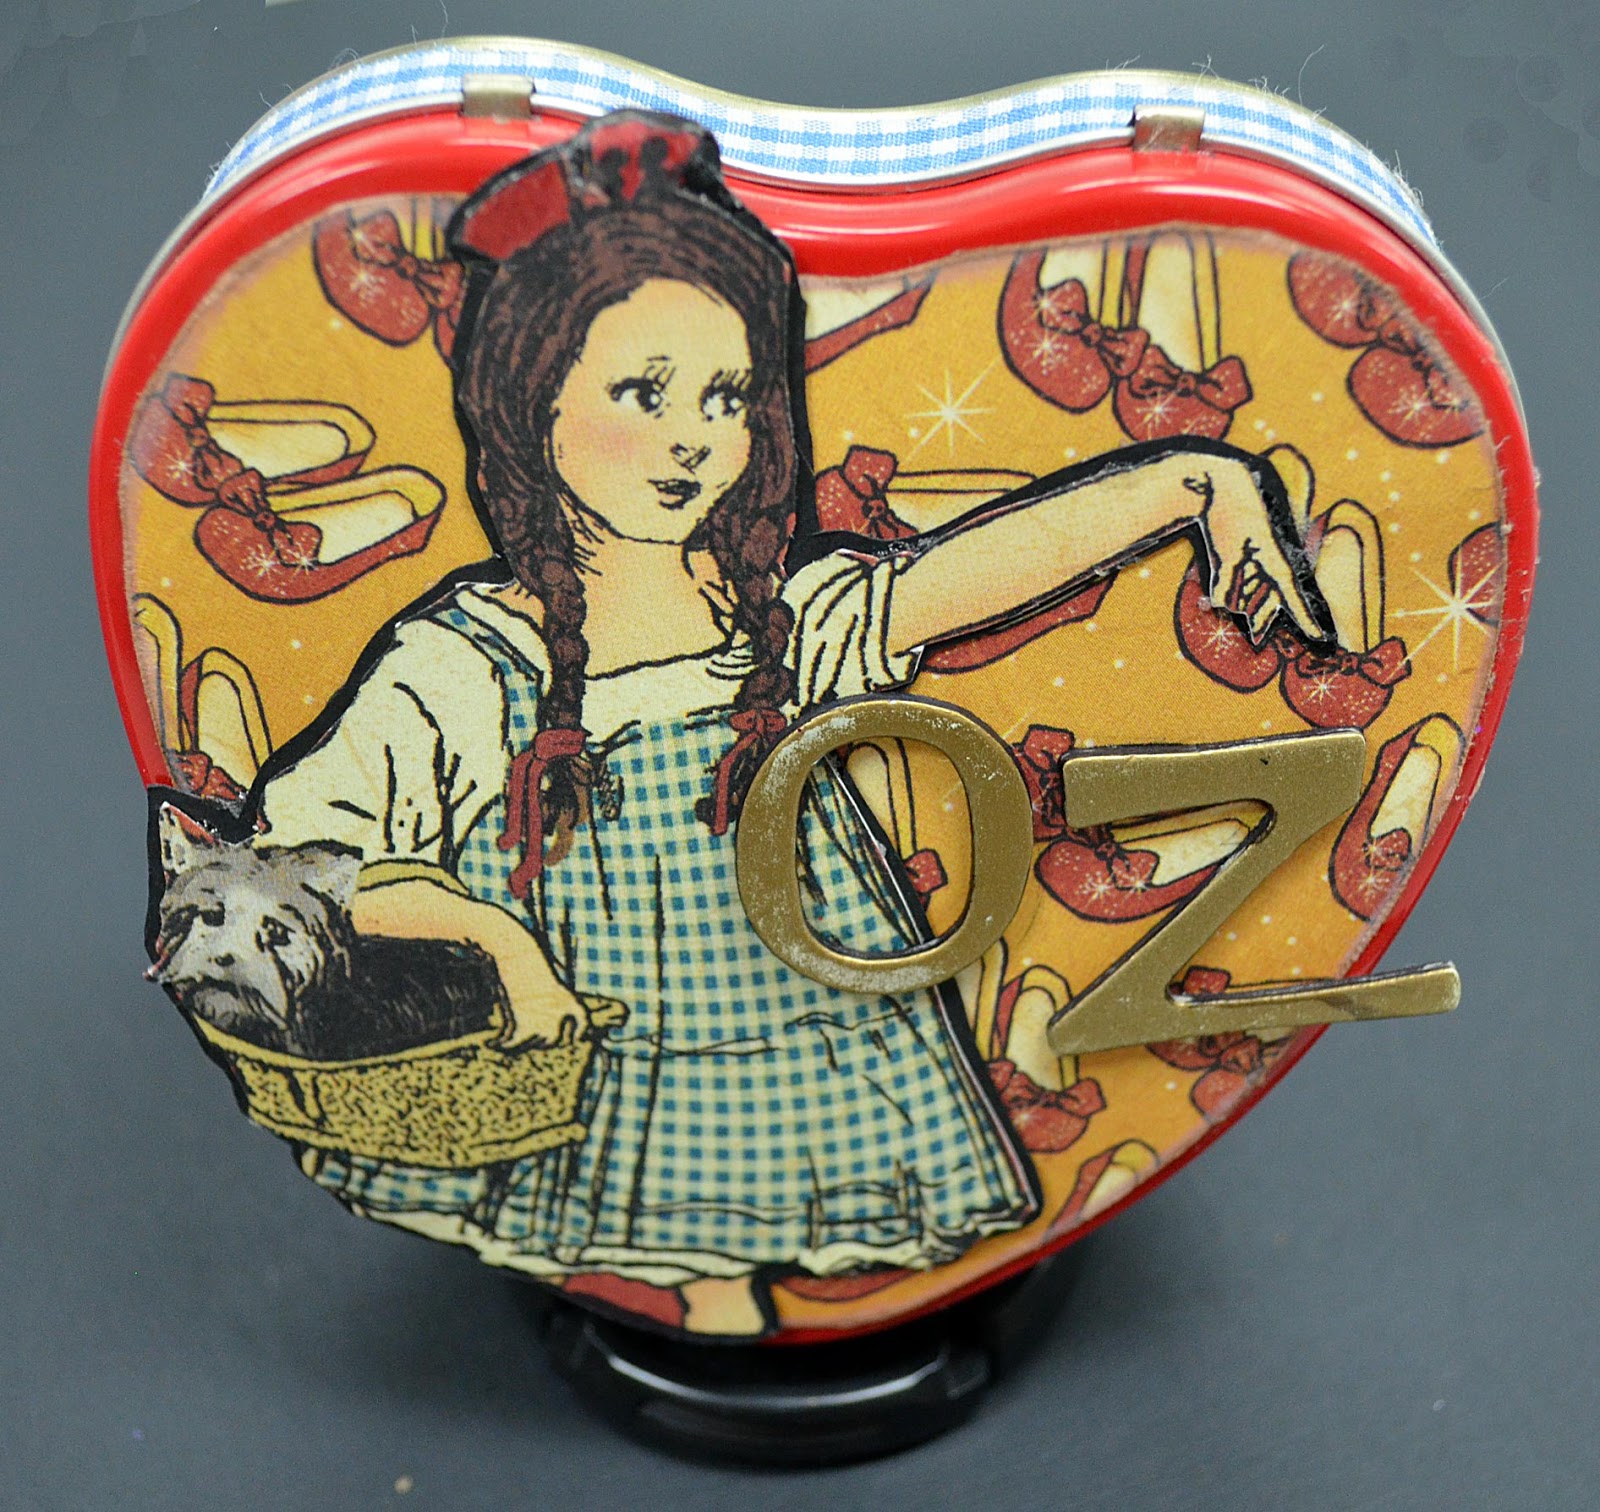
5. The Magic of OZ - Altoids Tin Mini
This adorable little album exists because I visited 7-11 at just the right time.  I have not seen these tins anywhere else.  And I think the 8x8 Magic of OZ paper fits the colors,  size and shape perfectly.  The inside pages can be flipped through or pulled out like a banner of hearts. All the pages were made using the paper inserts from the mints as a template for the hearts. So simple and yet so sweet. More information about how I made this mini and tin can be found in my full length post.


6. Secret Garden - Altered Book Art
For my final project I have made an altered niche book. This is my first altered book, although I have been interested in them for a while.  To make this piece I glued the pages of the book together and cut out a shadowbox or niche into the middle of the book.  Then I decorated the book using the Secret Garden papers. In the niche I fussy cut the little girl and flowers to create a diorama. I used some pieces from the 8x8 and 12x12 papers to create an illusion of scale and more dimension. I also created a cover and title page for my Secret Garden book.  And in the spine there is a hidden bookmark from which hangs the key.  I hope you enjoy this project as much as I did making it.  For more pictures and details about the Secret Garden art book, visit my full length blog post.


G45 Secret Garden - Altered Book Art

A few months ago I joined an Altered Book and Mini Album group, I have been making a bunch of mini albums at the meetings, but this is my first altered book.  I decided to do a shadow box style book with the center of the pages cut out.  Because this is a new type of project for me, this post will probably be wordy so I make sure I explain what I did. Also If you know a better method or have a good source I can use to make this better in the future, please let me know. Thanks!

I started out by shopping around for the right book.  I wanted an older book with pages that were sewn in, not glued flat to the spine.  I also wanted a book with a certain depth and size so that it would fit a decent sized niche inside.  I finally found my book at an antique village near San Diego.
Now that I had the book, I had to figure out how turn it into a shadow box. After looking on the internet for more information, I found that using matte gel medium on the edges of the pages would glue the pages together without leaving a shiny lacquered finish.  I also found a suggestion to use clamps to hold the pages really tight while the glue dried.  My boyfriend took it to another level and suggested we also use wood the length of the book so the pressure would be even and the pages would not have a wavy appearance.
 So that is exactly what we did. Leaving the front cover and a couple pages out of clamp, I put two coats on all 3 edges, using a smaller brush to clean up globs. I left the book to dry for several hours. (If you know what paper you are using for the cover, it is good idea to skip it in before gluing book pages to back cover, I didn't think of this and had to cut thin, awkward strips.))

When the book was dry I drew the out line if my opening on the top pages. using a very sharp craft knife I began to cut away at my shadow box.. Once I got to about a quarter of an inch in depth, it became difficult to cut. At this point I applied a thin coat of gel medium to the inside edges, re-clamped the book at left it to dry over night.  The glued edges will now become a sort of guide to help you cut the rest of the pages. If the cuts get messy or hard to cut you can glue the inside to make it stiff and less problematic a second time.After  got the shadow bow to the depth I wanted I cleaned up edges and the corners as best I could.  Then I glued it one last time on the inside and out side and let it dry for 24 hours. When it was dry I started to decorate the book.
 For the cover I used the floral side of the 12x12 Secret Garden pattern with 8x8 Leafy tree tops trimmed to center panel and edged with brown. I put the yellow Pretty Primrose on the spine. I then covered the spine with two layers on vintage lace, one pink and one tea colored.

 On the back I cut out the "thistle" panel from the May Flowers paper and matted it on a yellow page from the 6x6 pad of coordinating papers. I fussy cut a second rose and decorated with with distress and regular Stickles. I attached this over the rose on card with pop dots and then I attached the card to the center of the back cover.
On the front cover I added Petaloo , Prima and other paper flowers and leaves to the upper right and lower left corners. (I pre-glued these to small triangles so i could get the shape and size correct before attaching.) I added some pink and blue ribbon next to the flowers.  To create a title, I used the G45 matching stamp of the words "Secret Garden" to emboss the green 6x6 paper in detail gold; I hand outlined the words in black ink. I then roughly fussy cut around the stamp and added it to a sheet of the purple and then the word patterned blue papers. (I inked the edges with matching chalk shades.) I attached the title to the cover.
I used a sheet of the striped Sunkissed paper on the inside cover and the text side of Seed Fairy opposite it.  Using my Cricut I made a "fancy" library style envelope with Coming Up Roses.I affixed a sticker with a quote to front and glittered the corners. I then created a tag using a sheet of the pink 6x6 paper and two of the the May Flowers panels and chalked the edges in brown. I added some pink ribbon and petaloo flowers to the tag.
On the opposite page, I placed the Secret Garden sticker with its border. around that is a border of lace that seemed to give it a three dimensional look.  Below that is a nine square piece of the Seed Fairy paper with a fussy cut and glittered/Stickled rose from one of the May Flowers panels on top of it.  In the corners I added some Prima pearl embellishments from their Divine line.
I used the Beautiful Blooms paper on the page opposite the shadow box.  In the center I added another panel from the May Flowers page matted on to a pink page from the 6x6 pad.  I "painted" over the birds, flowers and cage with Stickles. (The waterfall blue looks really nice on the blue birds and blue ribbons)
For the shadow box, I used the blue 8x8 April Showers with the white 6x6 paper with the same text. I hand ripped it to create a distressed edge where they overlapped.These were affixed to the back of the recess. I then fussy cut out portions of the flowery trees and girl by the fence from both the 12x12 and 8x8 pages of the Secret Garden sheet.
I colored in portions of the flowers, the birds, ribbons, keys and fence with regular and distress Stickles. Once the glitter was dry I began to layer in my pieces. I added one of the flowery tree parts to the very back. In the middle I added the girl and one side of the fence from 8x8 pad. I then added Primrose paper around the recess like a frame. On top of that I added the larger section of flowered trees with the birds and flower (so this is the top layer.)  On the bottom corner I added a small portion of the 12x12 fence so that it was bigger than the 8x8 below it. This increases the visual depth of the scene in the niche.  On the bottom edge I added some pink ribbon to match the ribbon and bow on paper.  I also tucked a few more paper flowers in the corner.


After I was finished decorating the book itself, I made a book mark with the Primrose paper that slide in to space behind the spine.  On it hang some of the Secret Garden chipboard tags, a prima embellishment and a key on a blue ribbon.  On the top is a big blue bow with a small paper flower on the back.

So that is my first Altered Art book. I had fun making it and learning a new process.  I have already chosen another book to work with  and think I may put a mini book in the recess this time. What do you think?


Materials Used:
Cricut: Artiste

Paper: Graphic 45 Secret Garden (12x12, 8x8, 6x6, stickers and chipboard tags)
 Inks, Glitter and Paints: Ranger Stickles (distress & regular), gold embossing powder, brown, blue and purple chacks.
Other: Prima lowers and embellishments, Petaloo flowers, Graphic 45 metal key, ribbons and lace

G45's The Magic of OZ - Altoid Tin Mini

So, the other day I was browsing the shelves at 7-ll (as we all do from time to time) and I notice this adorable heart shaped Altoids tin. So I buy it (OK, I bought 2.) But what to do with it? Heart. Tin. Heart. Tin. Tin man! I should make a Wizard of Oz mini. And so I got out my Magic of Oz paper and get to work.
First thing is first and I dump all the mints out into a baggie. And I notice that instead of the usual folds of paper on top of the mints there are little card board inserts. And yes you guessed it I used those as my template to make all the heart shapes in this project.  In a couple of spots I had to shrink or grow the heart slightly, but never enough to be a problem.  I glued the shoes paper to the front of the tin leaving the red border showing around the paper. (I used a liquid glue.)
I bent the hinges so that I could remove the lid and put a blue gingham fabric tape around the bottom edge of the tin.I wrapped it around so the seam was hard to see and cut slits in the tape for the hinges to reattach. On the inside of the lid I added red and white polka dot fabric tape to the edge.
I added a slightly larger than the template heart in the 8x8 sized poppy paper and then layered a smaller than the template heart in the small tin man heart paper over top. Remember that the heart is upside down on the inside of the lid.  I trimmed down a chipboard tag with the ruby slippers that says " There's no place like home." and glued it to the center.  I added some plastic poppies I had found in an embellishment bar.  
Meanwhile, I had glued a Dorothy to a plain black cardstock and fussy cut her out.  The card stock was to strengthen the paper when it stuck out over the edge of the tin.I added some red Stickles glitter to D's bow ad trimmed her legs to fit the edge of the lid.  Below her pointing finger I added the word OZ in gold jewelry box Thickers.
To start assembling the mini book, I glued the hearts I cut out of the 8x9 Magic of OZ together in twos. I tried to put like paper together , but in the end it was a bit random.  Afterwards I went back with scissors or a distress sander and evened up the edges. After I had all my hearts glued together (there should be one singleton for the base that will be glued into bottom of the tin) I used a small hole punch on either edge of the hearts.
I then attached the hearts with larger sized jump rings, like you would use for jewelry.  I glued the last paper heart to the base of the tin, so the string of hearts was attached to the tin. And now I began decorating. I lined one side of each heart with glitter. After that dried I added fussy cut characters, more glitter and a couple chipboard tags. (This is another place whee thinning the chipboard is helpful
 
 
Wgen I got to the very last heart, the one glued to the bottom, I added a fusst cut of the stamped image of the word "home" from the matching g45 stamps.


I really adore this album and am already thinking about what I can do with the second tin!


Materials Used:
Paper: Graphic 45 The Magic of OZ (8x8, chipboard tags)
Inks, Glitter & Paint: Various colors of Stickles
Other: Plastic poppies, small doilies, red rhinestones, G45 Magic of OZ stamps