As I finish up my Graphic 45 Design Team application, I am filled with pride, happiness, some anxiety and lots of gratitude. I am happy and proud that I not only finished six brand new projects for this application, but that two of them were entirely new areas of crafting to me. I am also a little nervous because this is my first design team call. But most of all I am grateful. Grateful for the opportunity to apply for the G45 design team. And grateful to all my friends and family who have supported me as I created these projects.
So without further ado, here are my G45 Design Team projects.
Thank you again,
Laurel
1. A Ladies' Diary - Birthday Card
I made this card for my Stepmom's birthday. I was inspired by some vintage lace I had purchased and the beautiful subdued hues of A Ladies' Diary. The card has multiple folder style panels, a cut out window, removable tags, detailed fussy cutting and a mini envelope. I think it has a vintage elegance my Stepmom will love. For a more detailed description of how the card was made see the full length post.
2. Curtain Call - Interactive Mini Album & Matching Altered Box
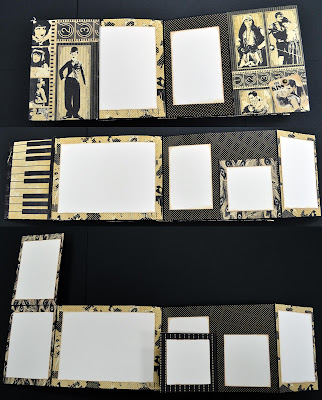
This Graphic 45 Curtain Call album with matching box is my tribute to my Dad. The sepia toned images of films , cowboys and music match up with his personality perfectly. I loved adding multiple flaps, pockets and tags to the album, so there is a hidden secret on every page. Even though I made it the album the interactive features make it seem different every time I paged through it. Finding the perfect sized cigar box to make a matching case was a great opportunity to make my first altered box. And it turns a mini album into a coffee table dispay piece my Dad can share with all his friends. To see the full album and how it was constructed please read the full length post.
3. Bird Song - Altered Cigar Box
Bird song is one of my personal favorite papers. I used it to make a his and hers jewelry box that sits on my bed side table. At first it was hard to decide what embellishments and decorations to use with the paper, but it became easier when I added the vintage chopsticks and metal flowers. I also used decoupage medium on the entire box, which taught me a lot about what not to do (glue the entire page to the box- not the edges) and to be patient (the bubbles and waves to disappear as it dries.) I am really proud of how this altered box turned out and that I learned some new techniques for the future. To read more about these techniques and see additional photos, see my full length blog post.
4. Two Carta Bella Mini Albums - Well Traveled & Traditions Papers
These two mini albums became a challenge I gave myself. Build two similar albums, but on one use the Cricut or any machines I wanted and on the other use only hand tools like a scoreboard. I found it was fun to try and figure out how to achieve some of the same kinds of effects manually. Maybe I couldn't quite get the complex shapes of the Cricut, but I could still layer the pattern paper and add hidden nooks. I think both albums are really cute and fun. For more information on the differences and similarities of these albums check out the full length post.
5. The Magic of OZ - Altoids Tin Mini
This adorable little album exists because I visited 7-11 at just the right time. I have not seen these tins anywhere else. And I think the 8x8 Magic of OZ paper fits the colors, size and shape perfectly. The inside pages can be flipped through or pulled out like a banner of hearts. All the pages were made using the paper inserts from the mints as a template for the hearts. So simple and yet so sweet. More information about how I made this mini and tin can be found in my full length post.
6. Secret Garden - Altered Book Art
For my final project I have made an altered niche book. This is my first altered book, although I have been interested in them for a while. To make this piece I glued the pages of the book together and cut out a shadowbox or niche into the middle of the book. Then I decorated the book using the Secret Garden papers. In the niche I fussy cut the little girl and flowers to create a diorama. I used some pieces from the 8x8 and 12x12 papers to create an illusion of scale and more dimension. I also created a cover and title page for my Secret Garden book. And in the spine there is a hidden bookmark from which hangs the key. I hope you enjoy this project as much as I did making it. For more pictures and details about the Secret Garden art book, visit my full length blog post.


No comments:
Post a Comment